
Jessica Flynn Peekaboo Tumbler Using CrystaLac
One of the most common questions I get with tumbler making is “Can I make this with CrystaLac instead of Epoxy?”
The answer is always ABSOLUTELY, YES! Some designs and materials need a little tweaking or finding an alternative, but I have yet to find a design style I can’t recreate with CrystaLac Grande Finale.
I thought it would be best though for me to show you a real example of how one tumbler can be made with epoxy AND CrystaLac.
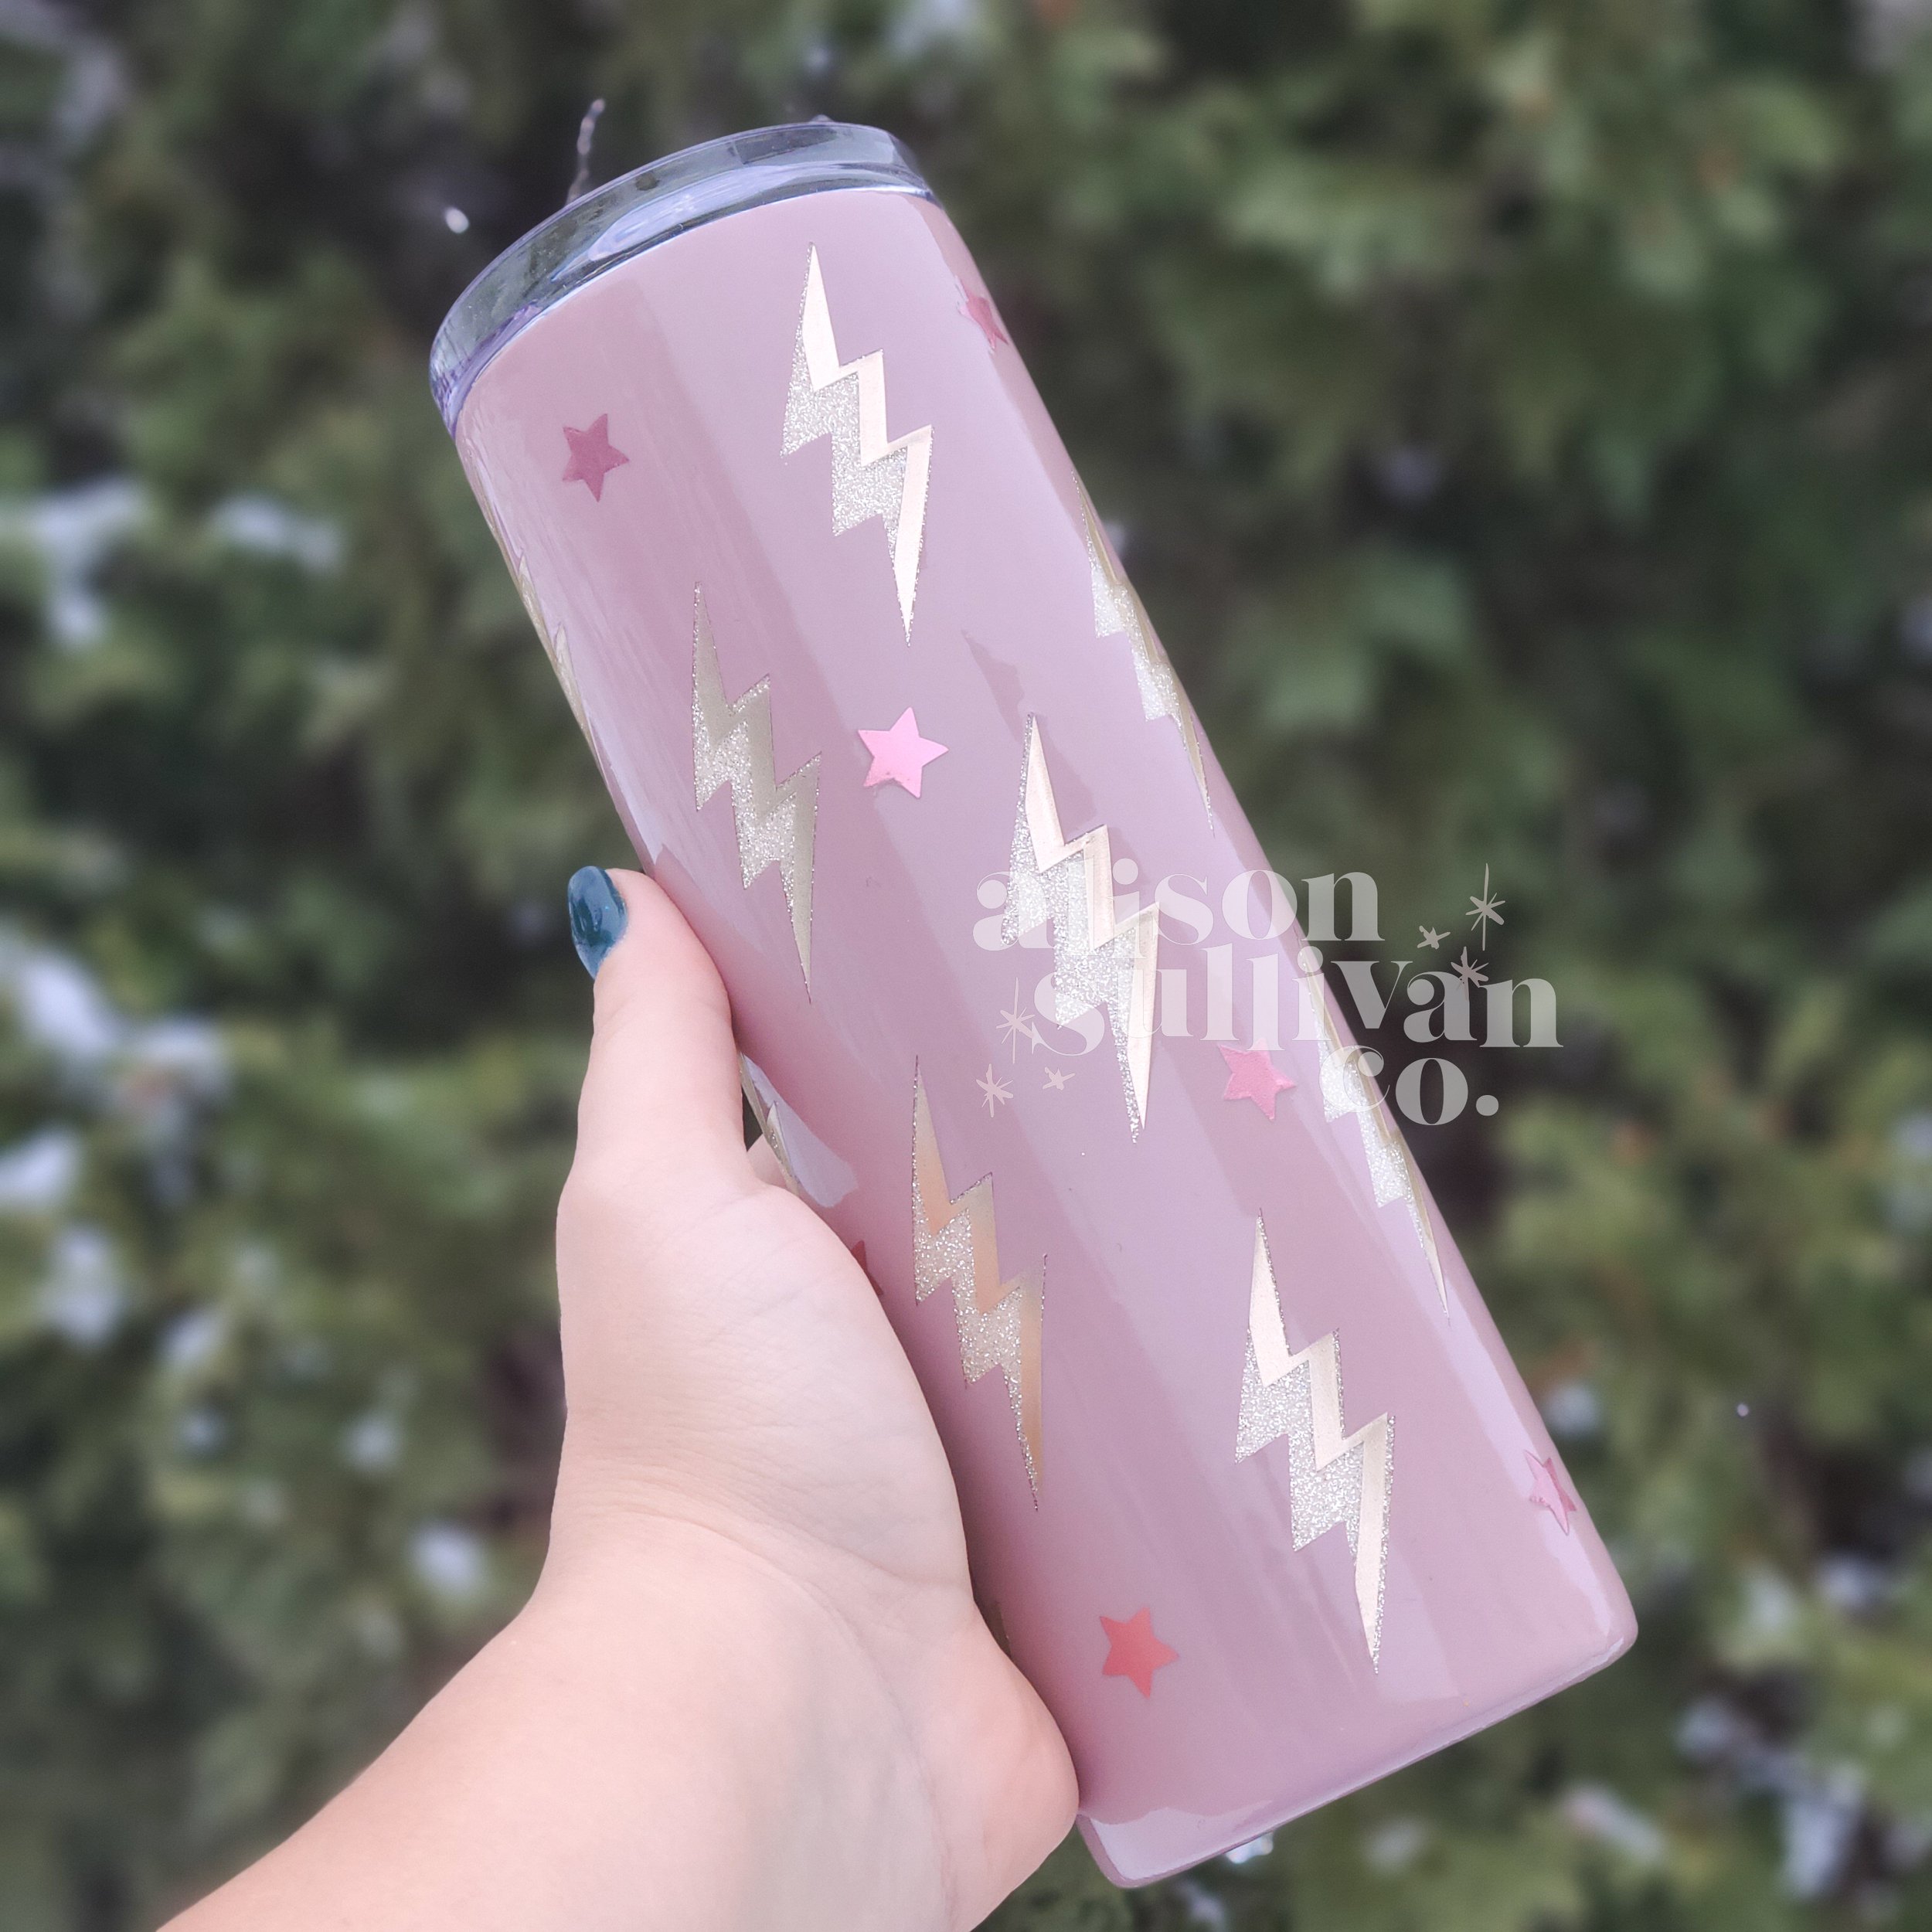
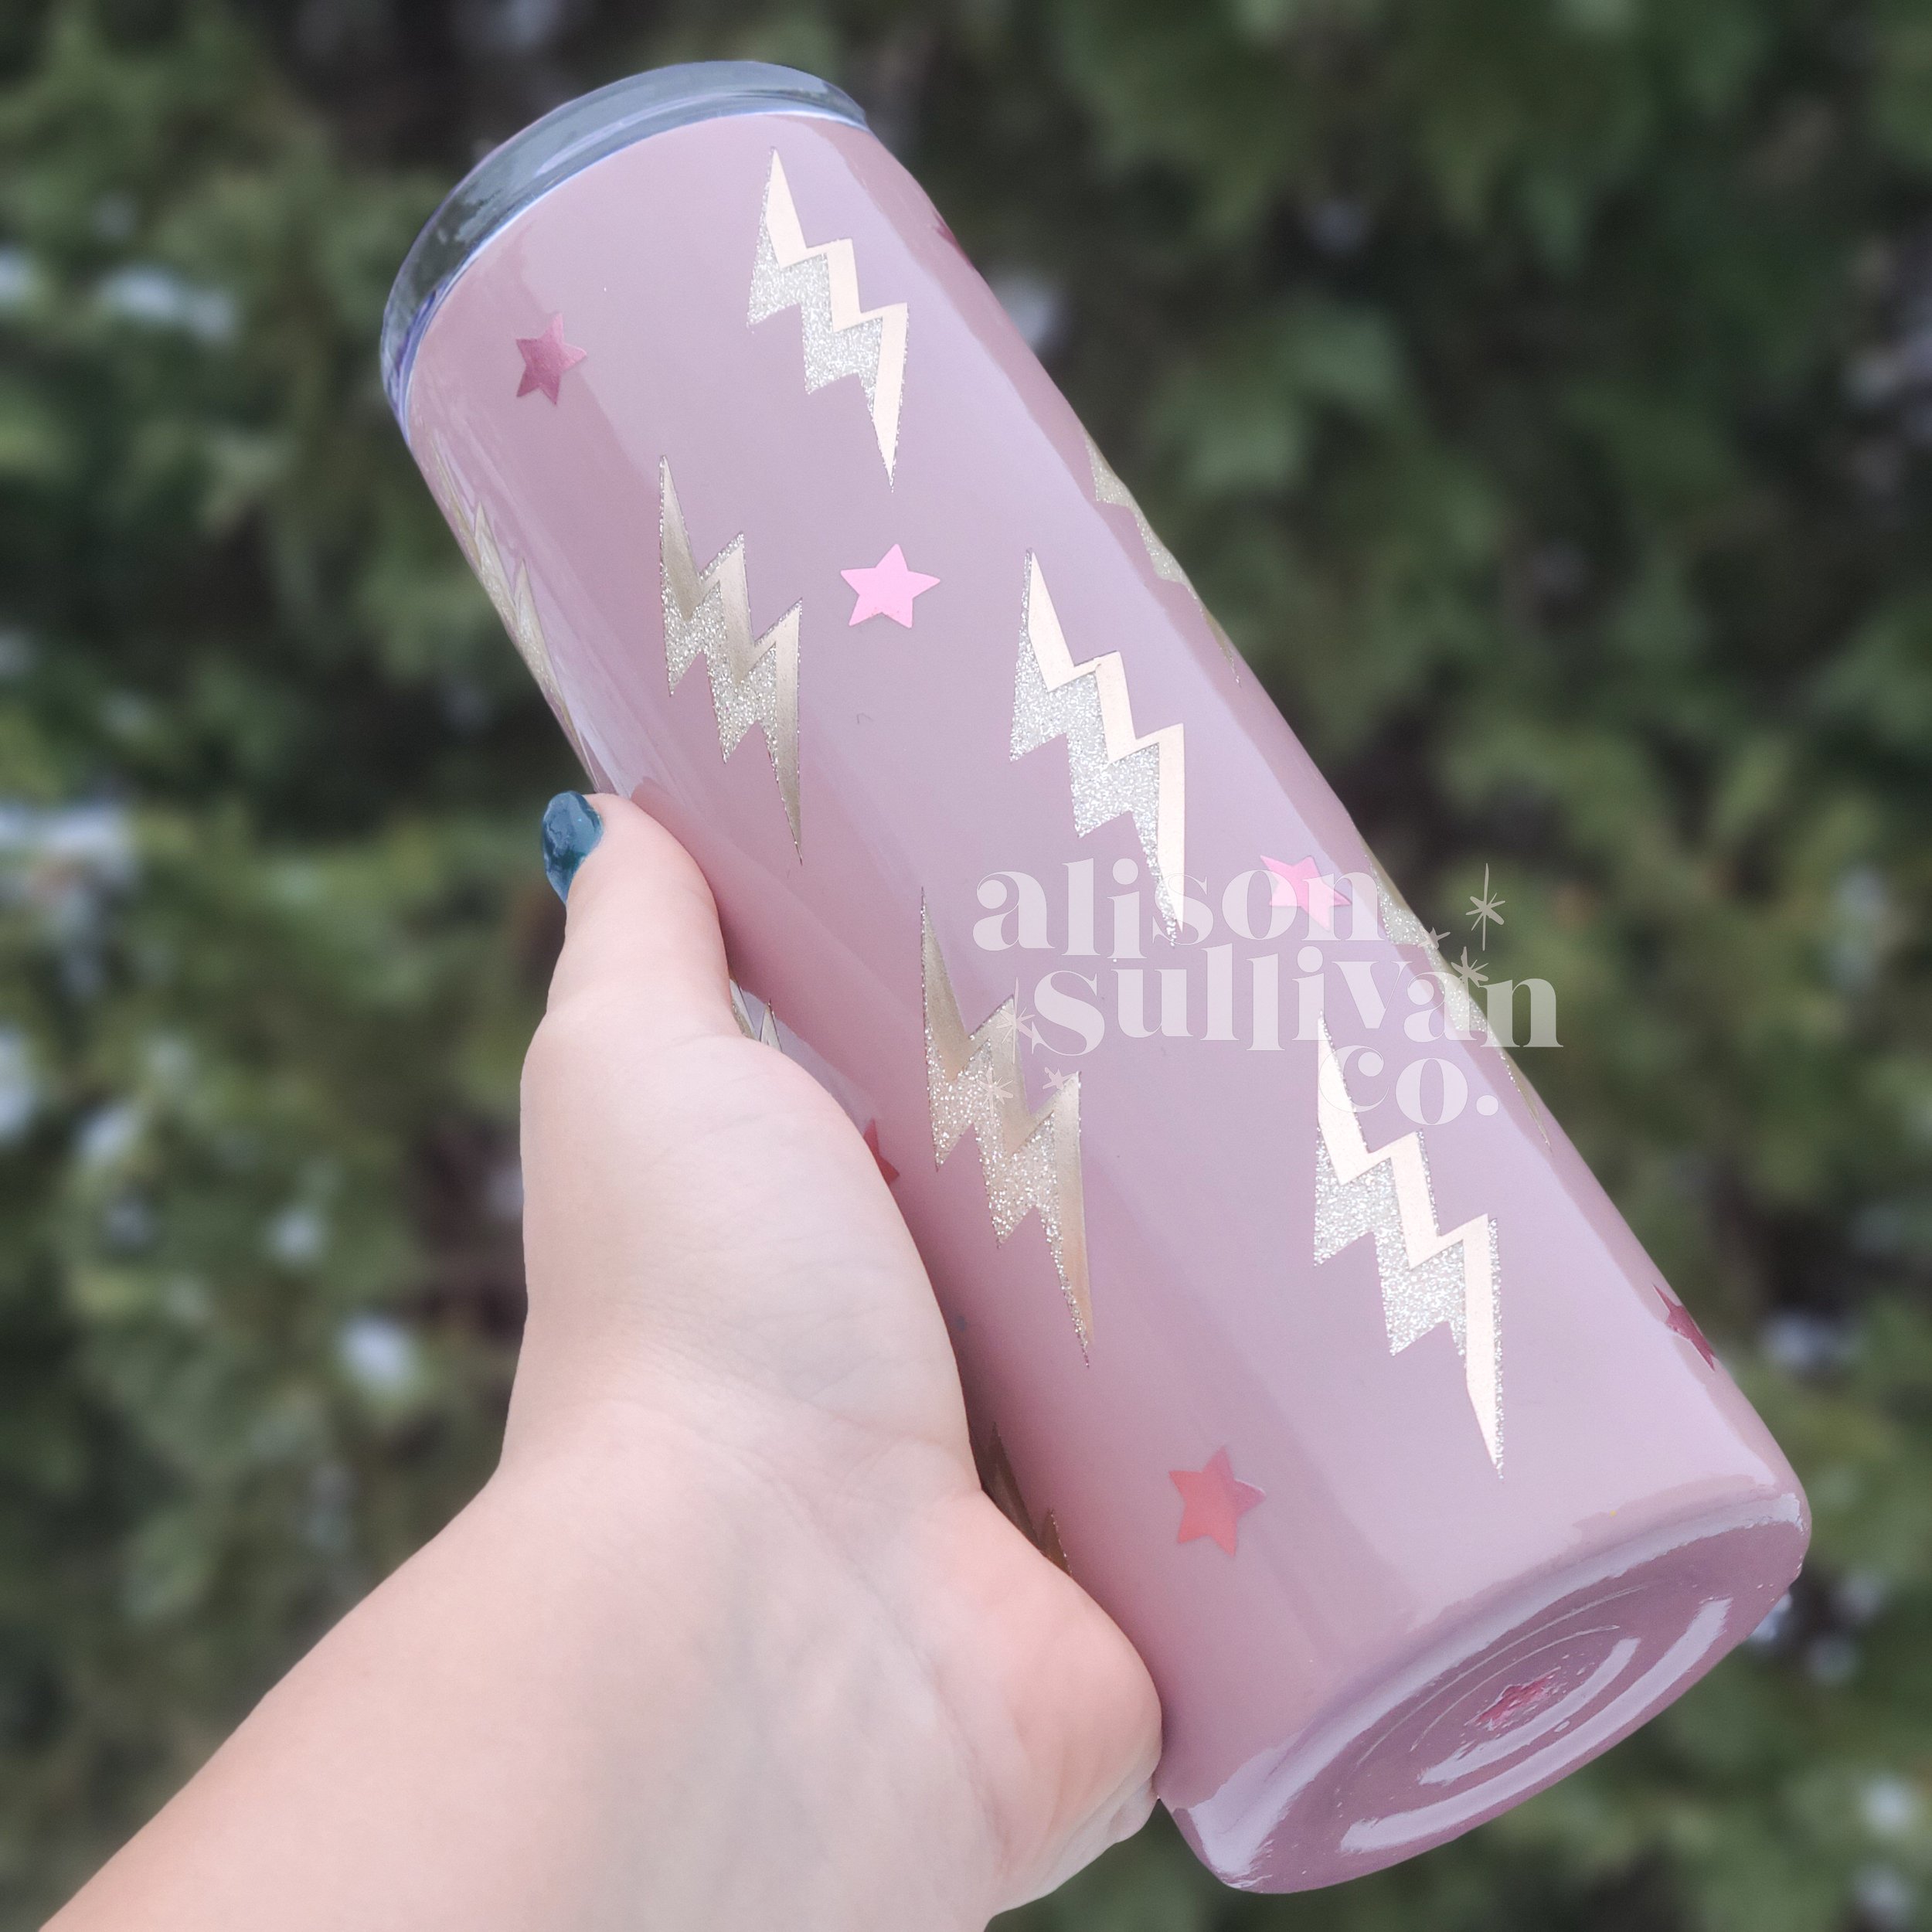
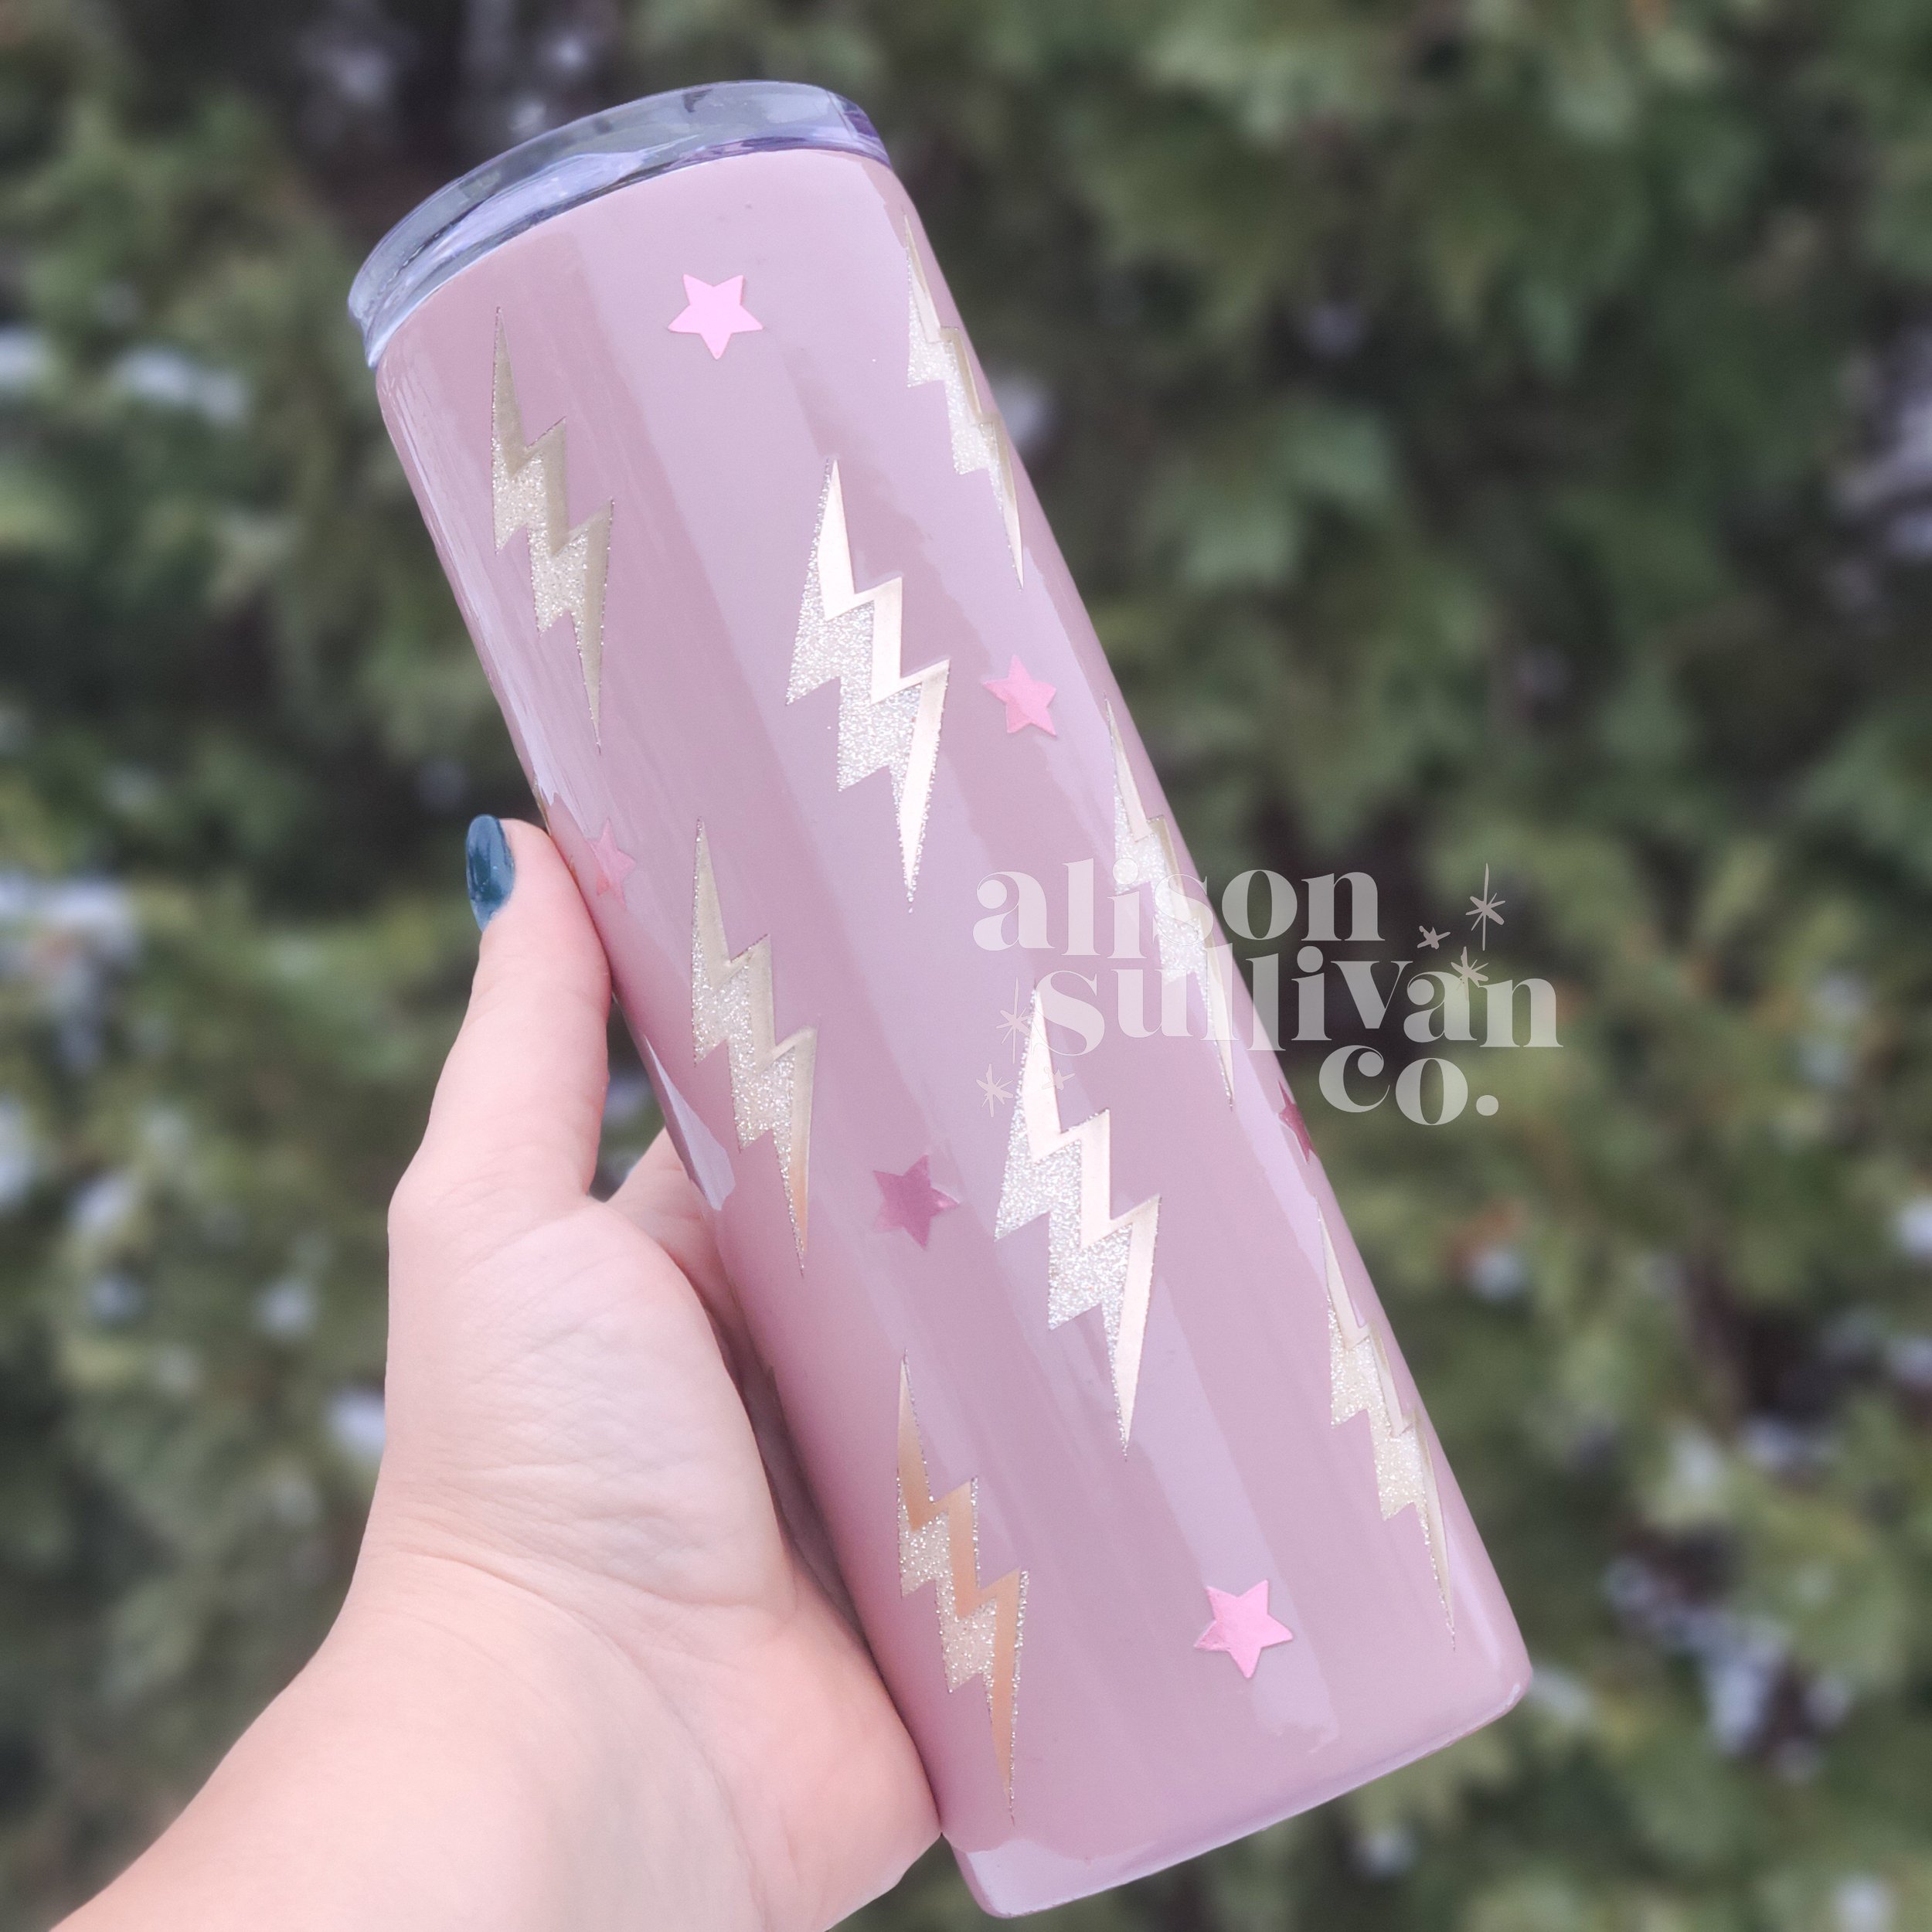
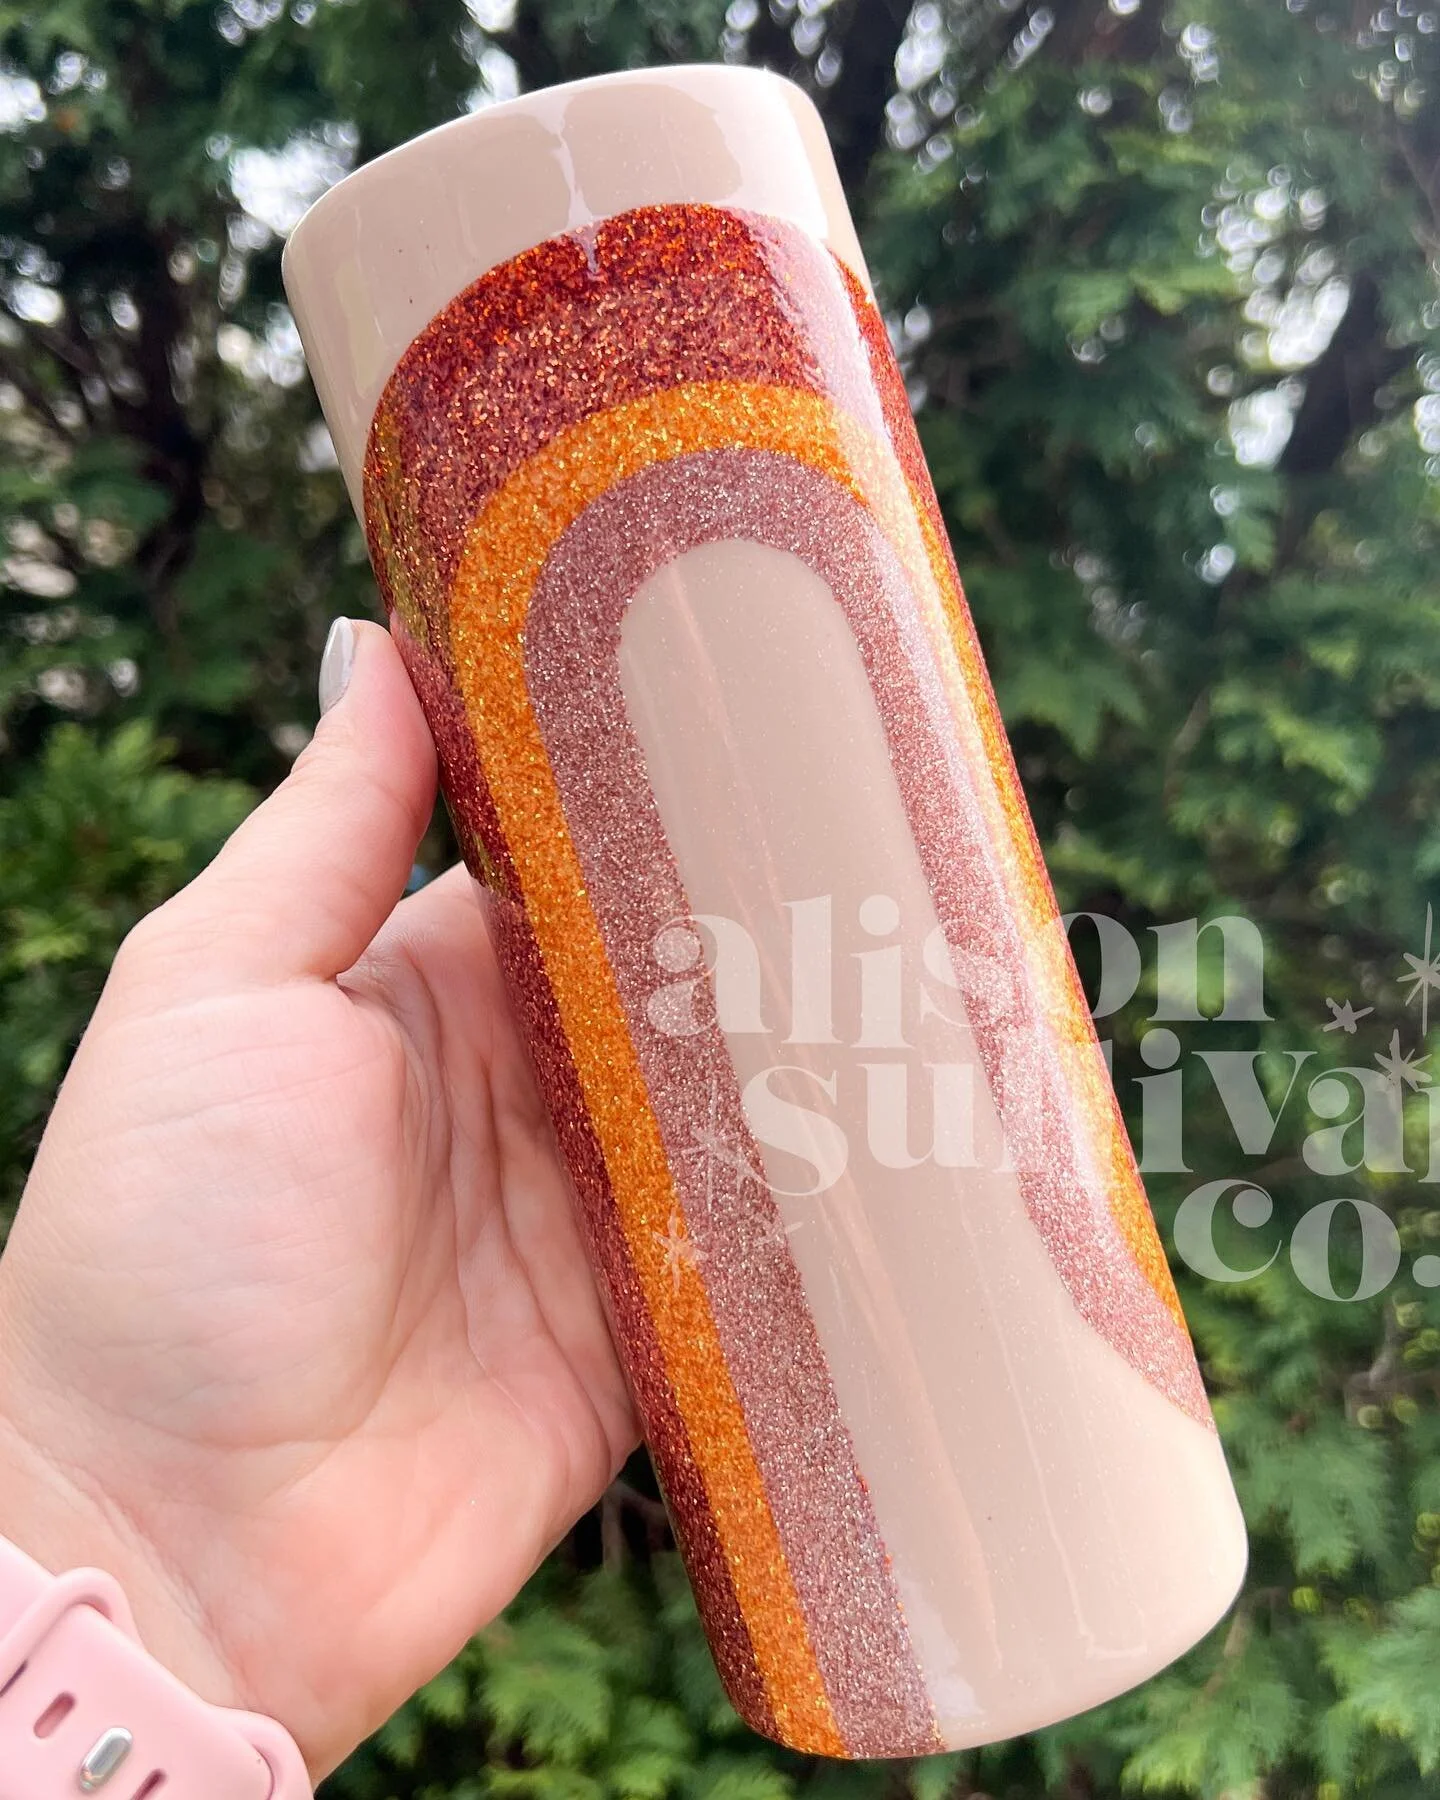
This tumbler was originally made by Jessica Flynn and I thought I’d show you how to use CrystaLac prodcuts to make it (with my own favorite color palette!)
Recommended Supplies
Stainless Steel Tumblers (discount code: alisoncrafts)
Glitzy Kreations Glitter (Discount Code: alison10)
Glitter Dipped Sips Glitter (Discount Code: alisoncrafts10)
Vinyl (Champagne & Rose Gold)
STEPS
STEP 1: PREP YOUR SURFACE & ADD BASE COAT
Prep is important for any project. Sand with 220 Grit Sand paper to prep your tumbler. Watch here for a demonstration. . Add the base coat for your tumbler. this one was a beige spray paint but the Rosie Beige Flip’n Awesome Paint would work too!
STEP 2: APPLY & SEAL GLITTER.
Use brite tone or glitter glue to apply glitter. Let Dry & seal with Glitter Glue. Let dry 2 hours.
STEP 3: BUILD UP COATS OF BRITE TONE UNTIL SMOOTH
Apply coats of brite tone every 4 hours. Sand every 3-4 coats with 400 grit sand paper until smooth.
STEP 4: ADD REMOVABLE VINYL & 1 COAT OF BRITE TONE
Add vinyl & do a coat of brite tone on top to prevent any paint seepage.
STEP 5: PAINT TOP COLOR
Do two coats of the vintage blush paint to get full coverage.
STEP 6: REMOVE VINYL
Remove vinyl to see peekaboo portions.
STEP 7: ADD VINYL DETAILS & LAYER BRITE TONE
I did two coats of brite tone before adding my vinyl details. Then I did 4 more coats of brite tone.
After you do 3-4 coats of BT, let it dry over night. Then do a light sand with 400 grit sand paper ONLY OVER THE VINYL. then follow up with a few more coats of BT until you are happy with how it looks!
STEP 8: CLEAN THE RIM
Once you’re satisfied with your finish, clean the rim! Let the cup dry for 5 days before giving it to it’s new home!
Watch Full Tutorial on YouTube:
Let’s Connect on Instagram


Secondary Blog Cover Photo